
If you’re not particularly artistic, want a high impact feature wall, and don’t want to do anything permanent in case you hate it…. This one’s for you.
All you need is:
- A public transit map found online
- Lots of colored tape (This pack had most of the colors I needed for the map I chose)
- A printer
- Clear scotch tape
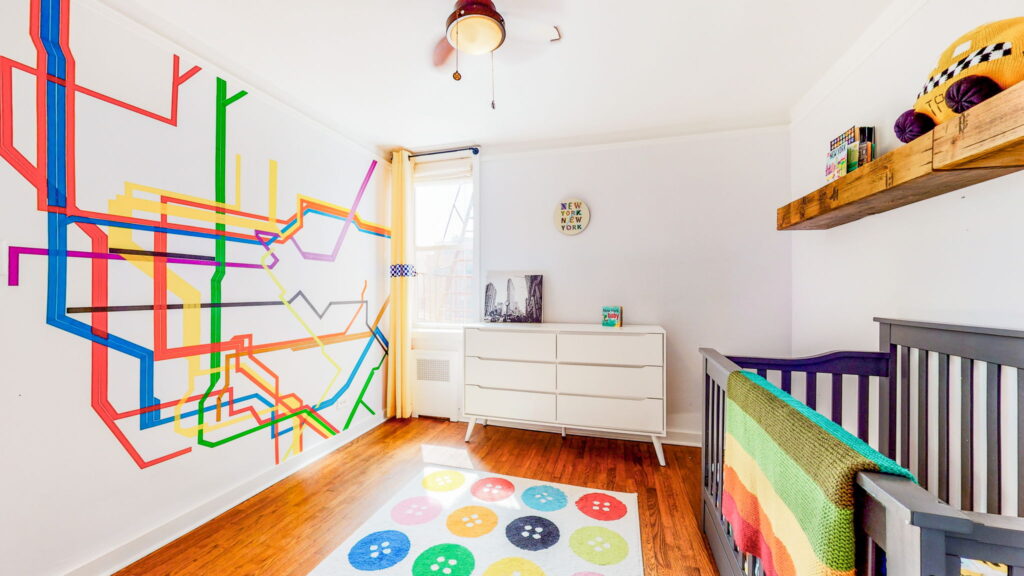
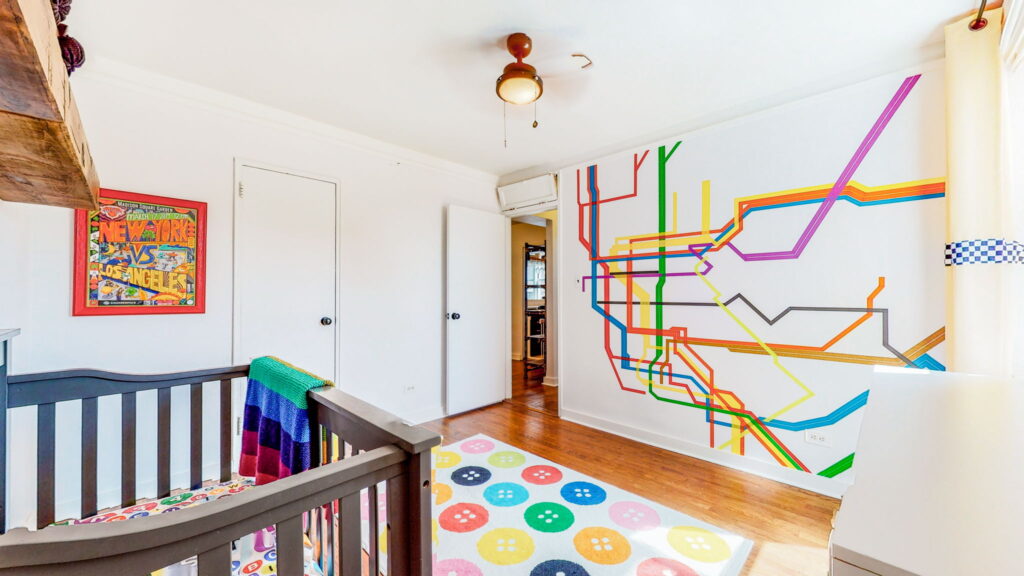
I’m a subway purist so I stuck to the same color scheme as the NYC MTA – which also worked because this feature wall was in my son’s nursery. When we sold our home to a couple a year later (sidebar, they went on to become some of our best friends), they kept almost everything in the apartment except the subway wall. It was just straight up too colorful for them.
So you could obviously make this with just black tape, or whatever color scheme you’re going for – if you’re using multiple colors, make sure you choose at least 5-10 unique ones (depending on how many lines your transit map has). What you don’t want is the same color tape crossing over the same color tape too often – then it starts to look like you ran out of colors.
This part is Important:
Once you’ve found your map online, save it as a .pdf. You can either use a file converter or just paste your picture into MSWord and hit Save As, and select PDF for your file type.
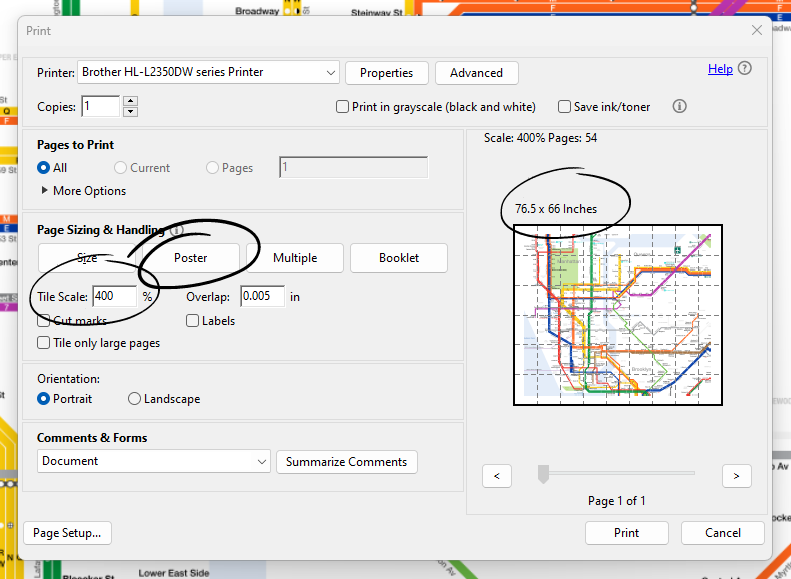
The reason I’m so obsessed with you getting this into a .pdf is because (drumroll), you have to print your transit map as a poster. This setting allows you to blow up your map to the scale of your wall and print each page as a part of the bigger picture. It’s the easiest way to see the map at the scale it’s going to be on your wall before you start laying down the tape.
Before you put any subway tape lines on your wall
Wash it. Like get a bucket of water and a rag and go over your wall multiple times, especially the corners and the high annoying areas by the ceiling. Skipping this step is the only way to mess this project up. So. Wash. Your. Walls.
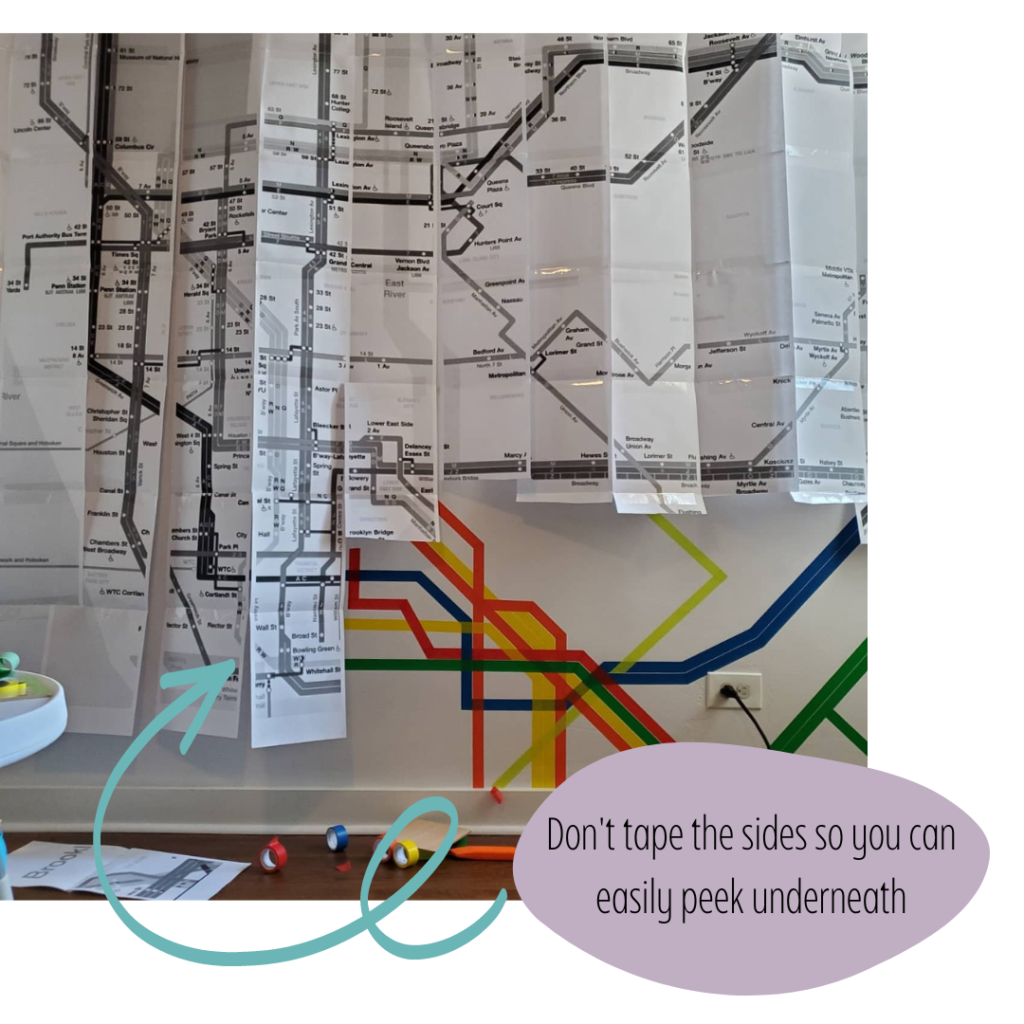
Once you print the map out, use the clear scotch tape to start taping the edges of the map together. Leave some vertical strips free so you can pull the map up from the bottom in sections to place your tape (see example below). Then, tape or pin your guide to your wall so you can start following the map.
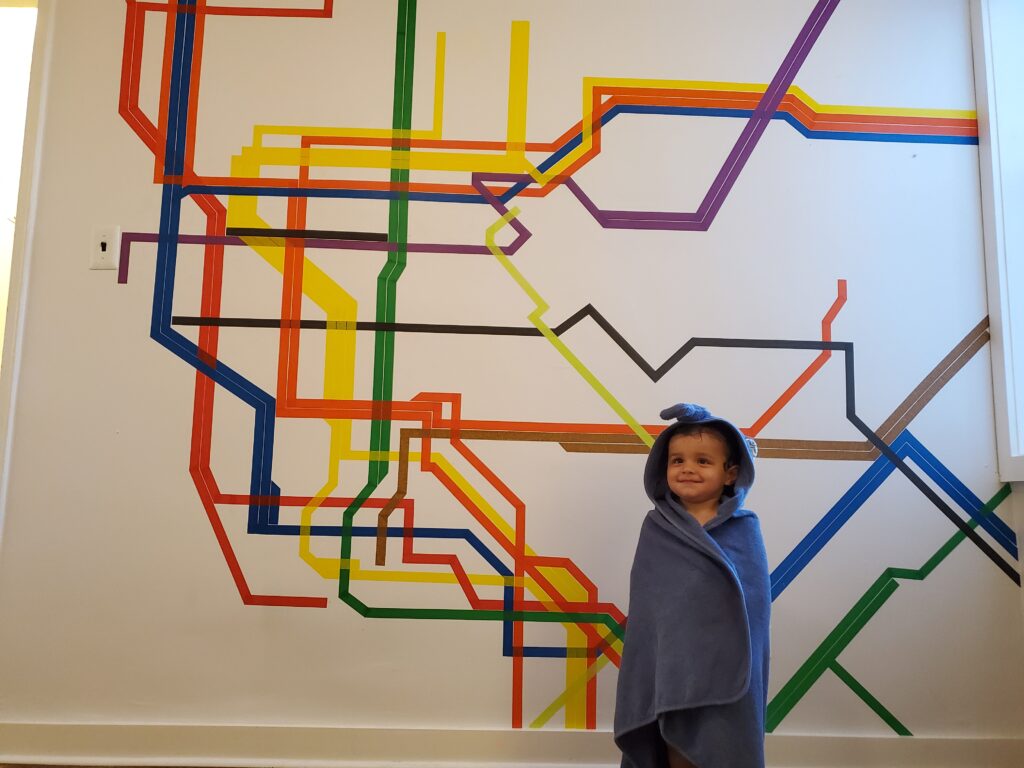
Then, start working in sections and copy the transit lines with your corresponding colors of tape. Occasionally you’ll have to make judgement calls where there are too many lines intersecting all at once, and whether you want to put that much tape on top of each other – it can get messy if you’re not careful. I dropped some subway lines in Manhattan and picked them up later in the outer boroughs because it would have been chaos otherwise.
Once you’ve got all of your tape up, you may notice that some of your tape edges are peeling back. It won’t be a lot of them (assuming you washed your walls down), you can either get some glue and use that to hold down stubborn edges OR you can go over your entire wall with a light coat of sealer. Tada. Your feature wall is done.
It took me a few days to get the entire map on the wall, but once I did, I got the cutest kid in the world to stand in front of it. And that’s what matters guys.

Leave a Reply